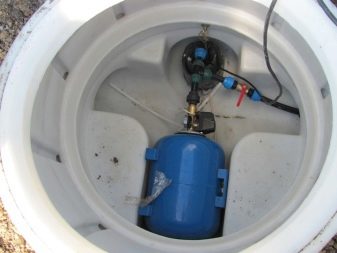
Hydroaccumulator in the water supply system: how and to what should it be connected?
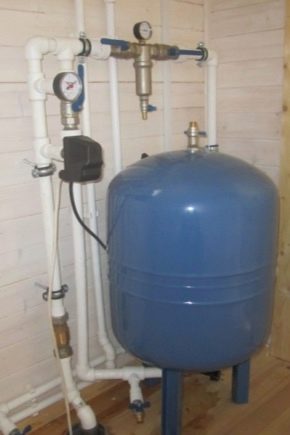
Traditionally, hydroaccumulators are in demand in the private sector and in settlements with problem water supply. This device allows you to make any water supply system more efficient. The installation and operation of the accumulator is a simple matter, but, like everywhere else, there are some nuances that need to be dealt with in more detail.
Purpose
This device allows you to reduce the load on the water pump: when pumping from a well, well or other capacity, part of the water enters the reservoir of the hydroaccumulator. Thus, the water from the tank will be used first, and the pump will turn on again only when the tank is empty. In general terms, the hydroaccumulator allows reducing the number of switching on and off of the water pump. As well as this device minimizes the likelihood of hydraulic shocks, which increases the period of maintenance-free operation of the entire water supply system. In heating systems, the hydroaccumulator is used as an “expansion tank”: excess of heated water goes into the tank of the hydraulic tank, reducing the overall pressure in the system.
It is not at all easy to connect a hydroaccumulator with your own hands, for example, through passage or deep, given the recommendations of experts.
Device, principle of operation and types
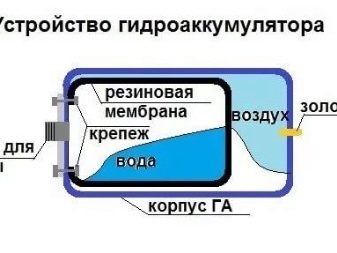
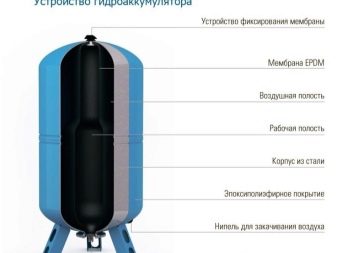
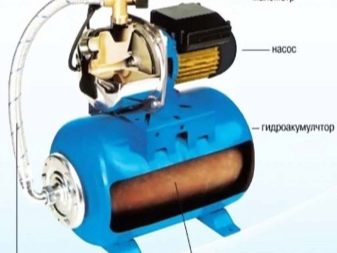
Regardless of brand, configuration, or purpose, almost All hydroaccumulators have a similar design, including the following elements:
- case on the rack (legs or reinforcement "shoes");
- membrane or rubber "pear" for pressure, which is located inside the case;
- air nipples, which are equipped with protective covers.
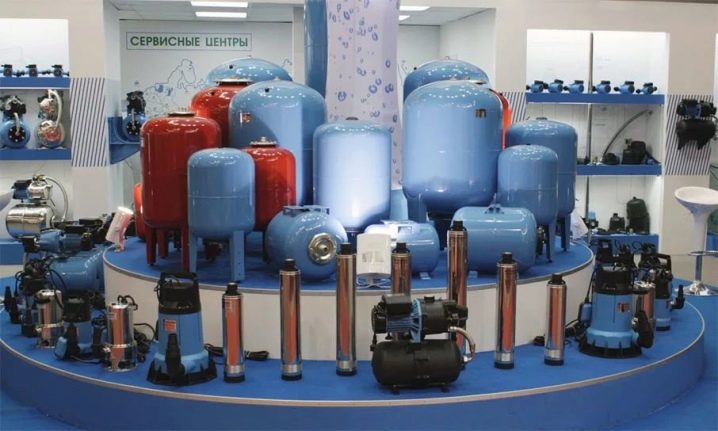
According to the type of housing (configuration), accumulators can be as follows:
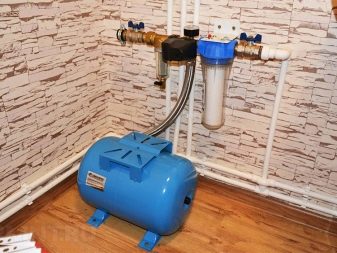
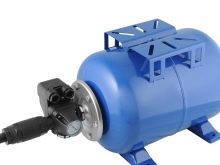
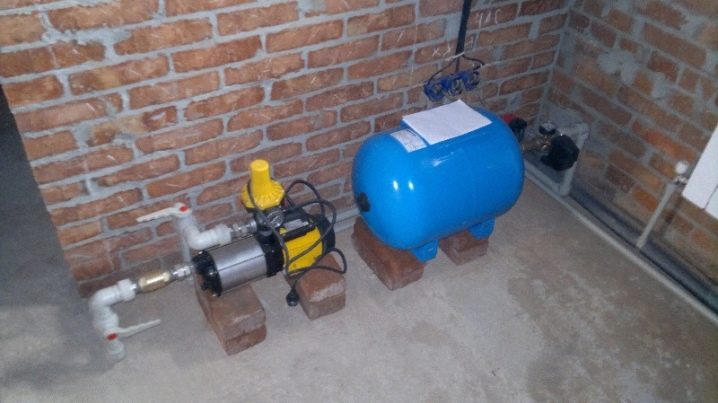
- horizontal models are used to connect to outdoor pumps;
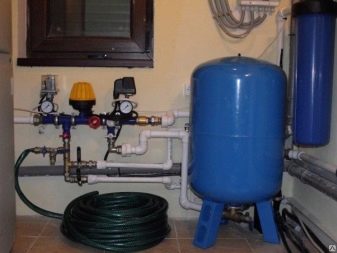
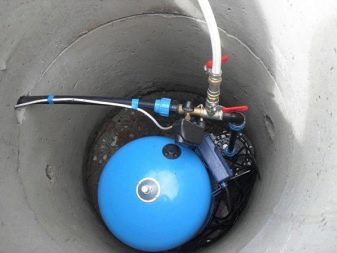
- vertical models are usually connected to a water supply system with submersible pumps.
Depending on the type of destination, various models of hydroaccumulators may have such additional structural elements as:
- for bleeding excess air, horizontal models are equipped with special cranes;
- drinking water accumulators are equipped with pears made of chemically neutral rubber, which makes it possible not to give an unpleasant taste to the accumulated water;
- Enclosures for heating systems are used as “expansion tanks” and play an important role in pressure regulation.
The configuration of the hydroaccumulator is determined on the basis of considerations of space saving, purpose, local features of water supply.
Criterias of choice
For long-term operation, experts recommend purchasing models with a pear. Membrane accumulators are more susceptible to corrosion, since the membrane is not able to isolate the walls of the case from the effects of water. However, for models with a pear repair is more difficult than for membrane analogues. Choosing a drive, you also need to consider future water consumption.
If the number of permanently residing in a house or apartment is no more than three people, sanitary devices - at least, then there will be enough capacity for 24 liters.
If there are more users, then an appropriate accumulator is required. Before installation, consider the following:
- number of users;
- the number of water points;
- the number of household plumbing appliances;
- availability of heating elements.
If the preliminary calculations were not final, for example, another person appeared in the family or the number of sanitary appliances increased, installing a larger tank or installing an additional tank would be the best way out.
Both procedures have approximately the same complexity and comparable equipment costs.
Installation: options and connection diagrams
Depending on the internal features of the plumbing system, installation methods may vary. It is worth considering the most popular options.
Connection to the pumping station
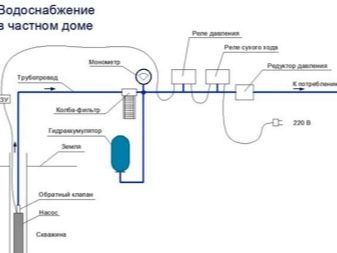
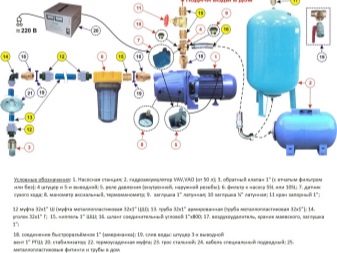
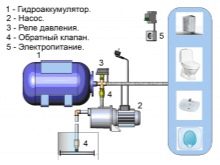
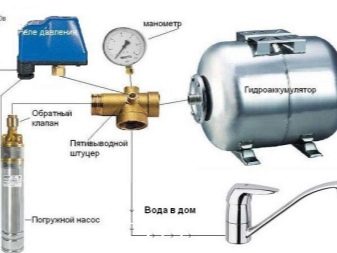
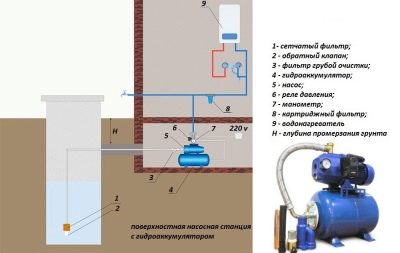
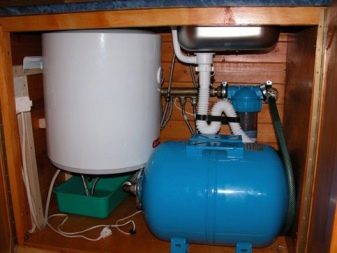
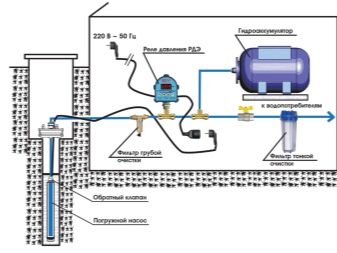
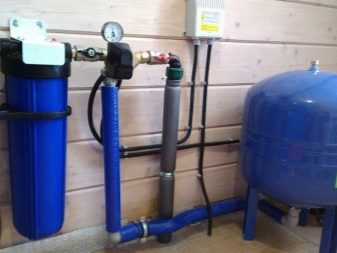
In this case, work on connecting the accumulator to the autonomous water supply system is carried out simultaneously with the installation of automation and adapters. The most common cases of installation involve the following components:
- pressure gauge;
- five-way choke;
- switching hydraulic relay (pressure switch).
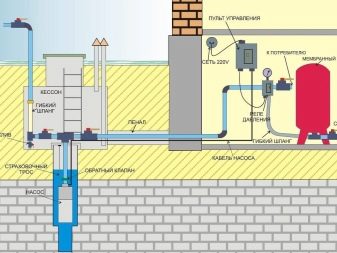
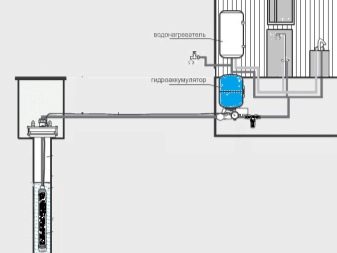
If a submersible pump is used for water intake, the wellbore should be equipped with a check valve and a dry inlet relay. If a simpler one is used for pumping water - a surface centrifugal pump, it is cheaper and more expedient to buy a pumping station as an assembly rather than install individual elements. The second option is preferable for those who have little experience, but there is a desire to install the pump yourself.
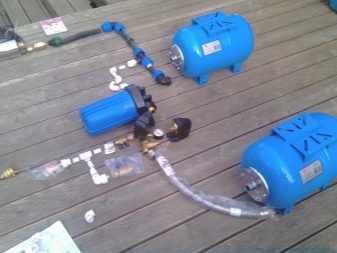
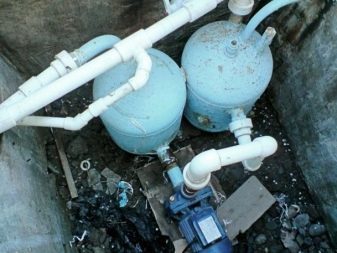
Two hydraulic tanks to one pump
Connecting two (or more) hydraulic tanks is a common problem for people facing a forced increase in water consumption. If the volume of one tank was too small, the installation of an additional accumulator is a little burdensome.
It is possible to install additional elements in parallel to the existing system: it is enough to use another transition fitting, a flexible hose or a water pipe. A system with two (or more) tanks is both a rational solution and an excellent safety net. If a membrane fails in one of the tanks, it will still be possible to use a pump, but not in intensive mode. Such a system will provide enough time to replace the wrong node.
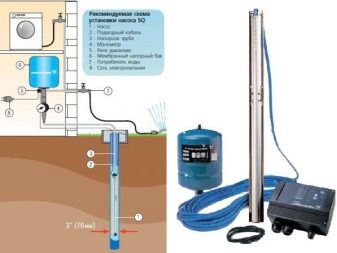
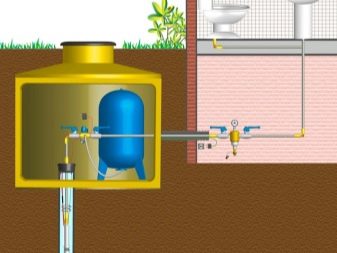
To submersible
You can guess that we are talking about a pump that is immersed in the aquifer of a well or well. For uninterrupted water supply, such a system must be equipped with a check valve: this device will not allow the pumped out water to return to the bottom of the well after use. Accordingly, the pump will not idle and will last much longer.
The check valve in most cases is already installed on the pump, additional installation may be needed during the repair process. In order not to be left without water for an indefinite period of time, it is recommended to purchase a pump with a spare valve, which is sold separately or comes with the pump.
Another important point is the quality of the pressure pipeline: since the pipe lies at a rather great depth, a possible failure can be noticed not immediately.
The first sign of problems with the pipeline is a sharp drop in pressure; the accumulator takes longer to draw water, this gap may increase over time.
Surface
The connection of the accumulator to the system with an external centrifugal pump also has its own nuances, namely:
- First of all, it is necessary to check the internal pressure of the tank: it should not exceed 1 bar;
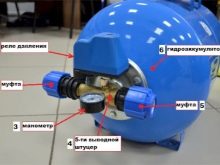
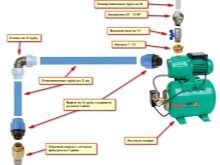
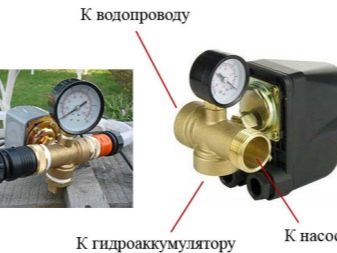
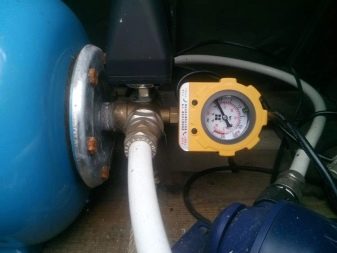
- To prepare for the connection, you will need a five-pin connection. This small but very important detail unites the accumulator itself, the pipeline, the pressure switch, the pressure gauge and the external pump. Before the immediate installation process, stock up with sealing materials (sealant or plumbing tape);
- to attach the fitting to the tank, you should use a rigid hose or a flange with a check valve;
- after installing the tank, it is worthwhile to install the remaining elements: a pressure gauge, a relay, a water supply system leading to the pump unit;
- Before starting operation, a series of on and off cycles should be performed to identify possible leaks;
- if something went wrong, you need to find out the cause of the problem and, if necessary, repeat the entire installation cycle again.
To water heater
The accumulator in the system with the storage water heater performs the function of the expansion tank. Water in the process of heating increases in volume, which also increases the load on the water supply system. Since the pressure rises in a closed space, the process can become very critical, and the temperature drop is unacceptable. There is a need to move this excess pressure somewhere. Here hydroaccumulator comes to the rescue. Excess heated water will go to the hydraulic tank, which will normalize the pressure in the system. Further, the water from the expansion tank can be used for domestic purposes.
Relay Setup
To understand the principle of operation of the pressure switch on the hydroaccumulator, you do not need to have special knowledge - everything is quite simple. Up to full filling, a water tank is supplied to the tank with a membrane (or pear), which causes an increase in pressure in the system. When it becomes maximum, the relay is activated and the water supply stops. As the operation proceeds, the pressure begins to fall, and when the minimum threshold is reached, the relay is activated again and the water supply is activated. The above cycle is repeated until the system is in good condition.
Many people mistakenly imagine the process of mounting a relay to be transcendental. In fact, this is far from the case. Any homeowner in the private sector who has a well or an artesian well at his disposal can do this task on his own. The main thing - to treat this with intelligence and patience. After all, water supply to a private home is a vital thing.
It should be understood that the relay is an “intermediate link” between the plumbing system and the power supply system. Obviously, this device has a huge responsibility. For this reason, all the nuances (and they are not so much) should be treated with the greatest possible attention. To secure the system, it is recommended to allocate a separate power line. For connection it is necessary to use two-core copper cable. Wires must be grounded and well insulated: it’s about the interaction of current and water, and this combination is always dangerous for humans.
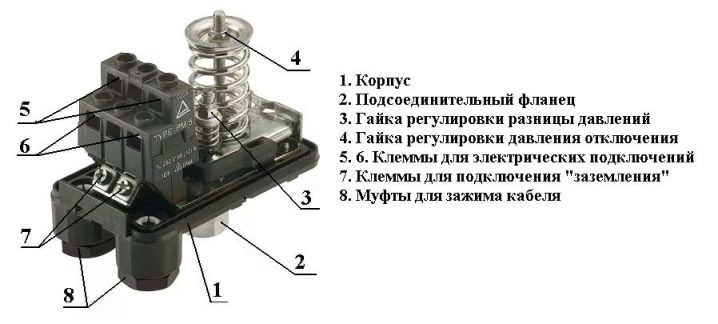
Wiring must be connected to the contact block through the perforations on the housing. Further, according to the instructions, you should connect the phase, neutral wire and grounding with the appropriate terminals. You need to be careful and cautious, the whole process of mounting the relay must occur in a de-energized environment. Care must be taken in advance. In no case should not ignore the elementary rules of safety.
To adjust the pressure switch on the accumulator, you need a high-quality, high-precision pressure gauge, capable of measuring pressure to exactly one tenth of a bar. The more accurate the pressure gauge, the faster the adjustment will occur. To avoid mistakes in further work, you must adhere to the following sequence of actions:
- it is necessary to turn on the system, record the gauge indicators in the on and off cycles of the relay. At this stage, it is possible and necessary to identify the faults of the pressure gauge;
- It is necessary to adjust the spring of the lower pressure level (it is the largest). To fit, use an ordinary wrench of the required size (it is best to have a wrench);
- need to test the exposed level.If something went wrong, repeat the previous step;
- then, tighten the nut of the upper pressure spring (it is smaller);
- It is necessary to conduct a full test of the system. If there are any shortcomings, then repeat the entire setup cycle again.
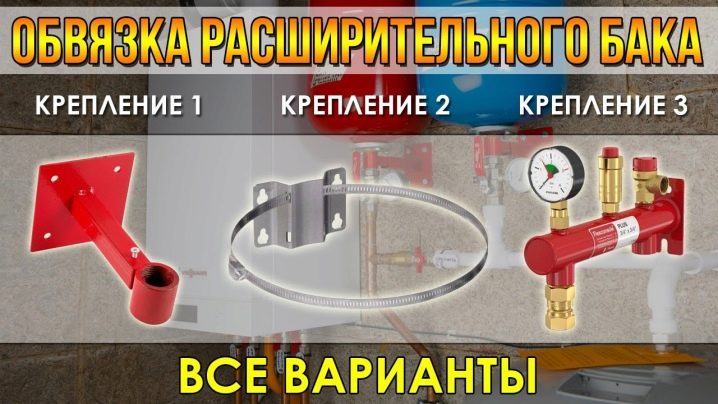
Expansion Tank: Strapping
As mentioned above, in the heating system the expansion tank performs a restrictive function: it takes away the excess heated water to reduce the pressure in the system. Strapping is usually called the technological node connecting the boiler with the rest of the heating devices. It seems to be simple: the boiler gives off heat to the water, the pipeline transports the heated water throughout the system, the heating works.
But besides heat generation, it is necessary to ensure the stability of the entire system. To do this, follow these steps:
- provide heat circulation conditions;
- create conditions for reducing excess expansion with an expansion tank;
- ensure high-quality system operation by proper selection of pressure metering devices;
- prevent air from entering the pear through the membrane (excess air pressure must be released);
- prevent mechanical damage to the expansion tank;
- prevent contamination, precipitation, suspension.
To unload the expansion tank will help connect several heating pins, working in different temperature conditions, for example, batteries and systems "warm floor".
Note: The accumulation of heat is a process of interaction between the water supply system and the power supply system.
In some cities of Russia there are so-called electricity tariffs. Among them are favorable nightly rates. If it is possible to use the "night" tariff, then heat is best accumulated at night, and using it during the day, when a kilowatt per hour is more expensive.
See below for how the accumulator works.
